

Create your first server
Seven quick steps through the Create a Server window. You can change almost everything later.
-
Step 1 of 7
Open Create Server
On My Servers, click Create Server (or New Server in the sidebar).
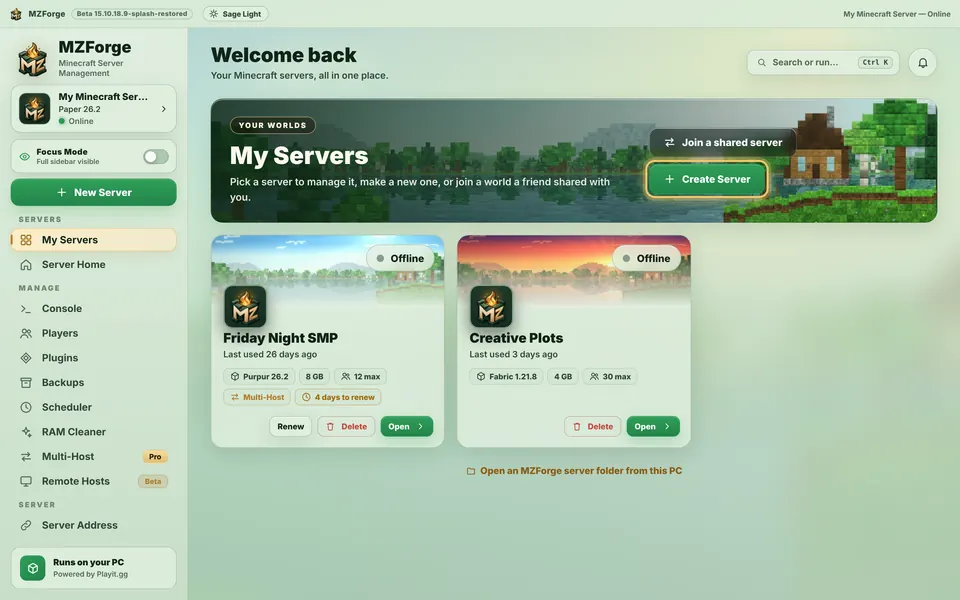
Real MZForge screen · example data -
Step 2 of 7
Name your server
In the Server step, type a name you'll recognise. It only changes what MZForge shows, not your address.
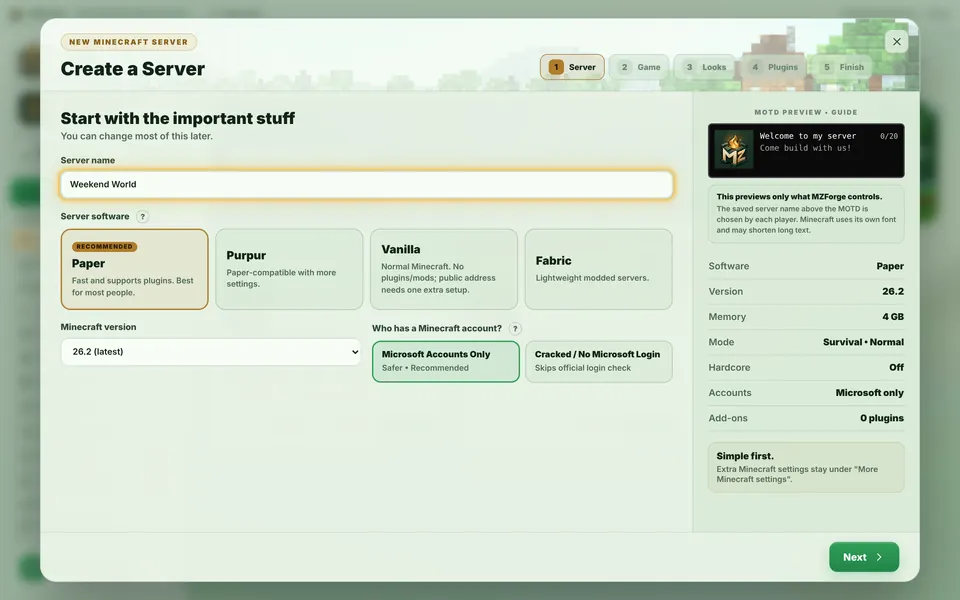
Real MZForge screen · example data -
Step 3 of 7
Pick the software and version
Choose Paper — it's recommended and gets the automatic Playit address. The newest Minecraft version is picked for you. Keep Microsoft Accounts Only unless you know you need otherwise.
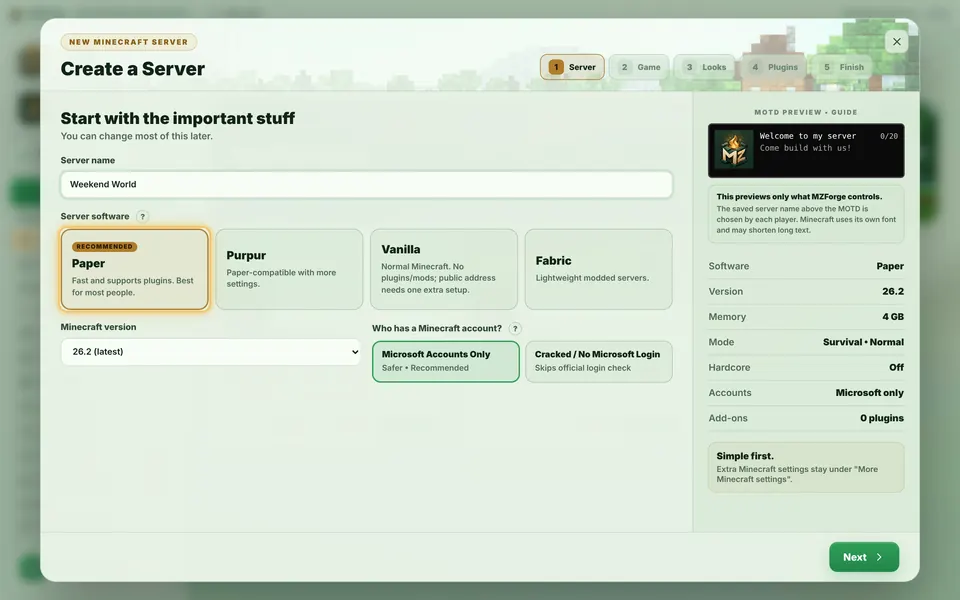
Real MZForge screen · example data -
Step 4 of 7
Game settings
In Game, pick the memory (4 GB is a good start), how many players, who can join, the game mode and difficulty.
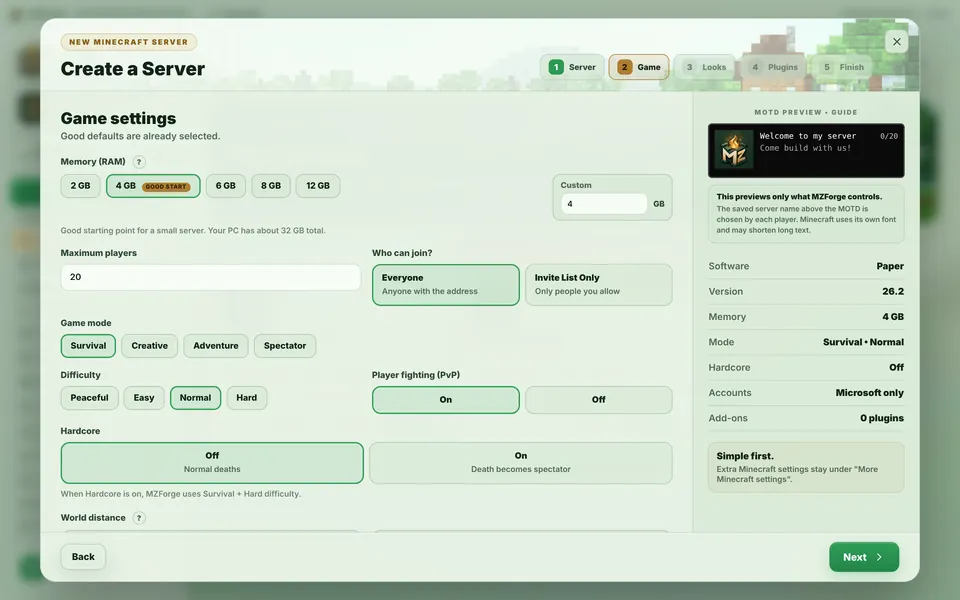
Real MZForge screen · example data -
Step 5 of 7
Make it yours (optional)
In Looks, write the two lines people see in their server list, choose colours and a server icon. Skip it if you like.
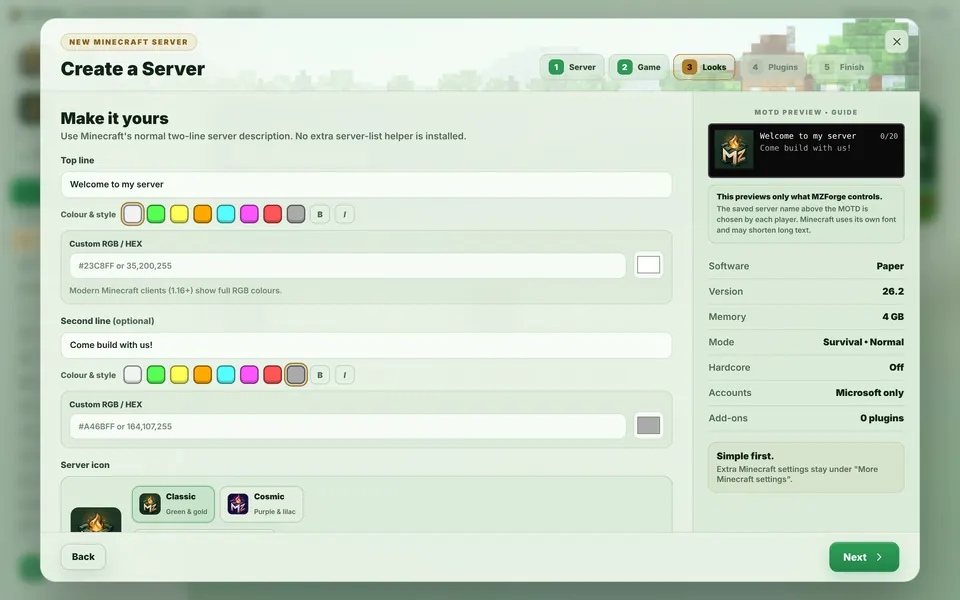
Real MZForge screen · example data -
Step 6 of 7
Plugins (optional)
In Plugins, tick any popular starters. Each one is checked against your exact version. You can add more later.
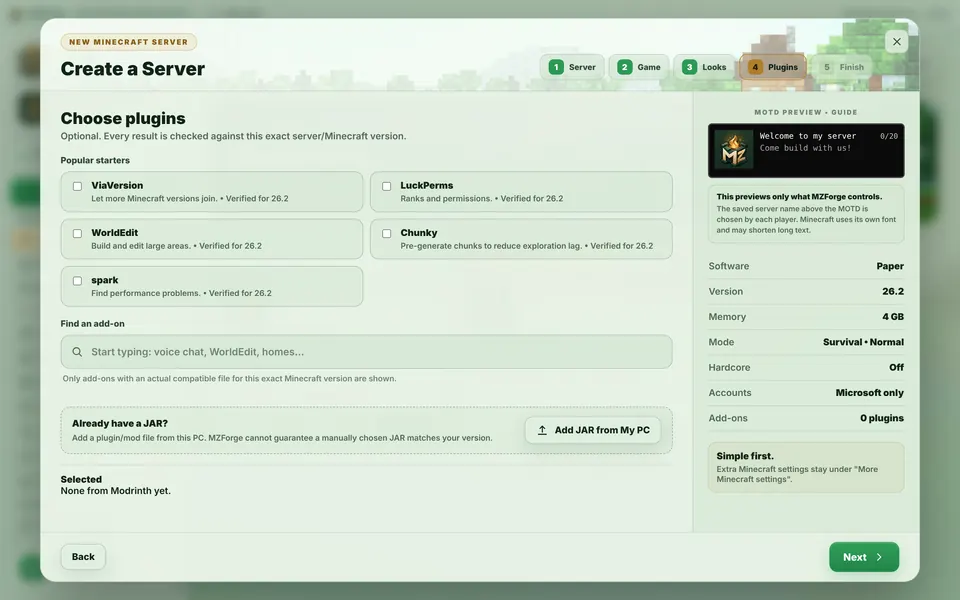
Real MZForge screen · example data -
Step 7 of 7
Accept the EULA and create
In Finish, check the summary, tick I accept the Minecraft EULA, then click Create My Server.
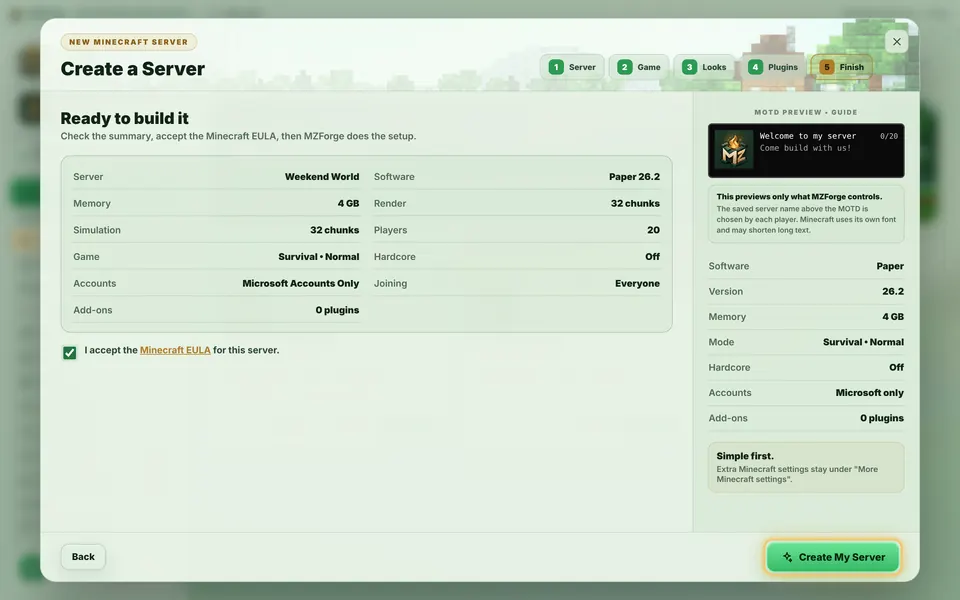
Real MZForge screen · example data


